How to Create a Hierarchical Protocol in AssaySmarfs?
AssaySmarfs is designed to help you turn even the most complex, messy protocol into a clear, structured, and easy-to-follow workflow. Its built-in hierarchy guides you step by step, so you can focus on your science while AssaySmarfs keeps everything organized.
Understanding the AssaySmarfs Hierarchy
Every protocol in AssaySmarfs is built from hierarchical elements:
- Processes – top level
- Sub-processes – second level
- Sub-subprocesses – third level
- Steps – the most detailed level (instructions)
How these elements relate
- A process can contain sub-processes, sub-subprocesses, and steps.
- A sub-process must belong to a process.
- A sub-subprocess must belong to a sub-process.
- A step can belong to a process, sub-process, or sub-subprocess.
These built-in rules ensure your protocol always stays logically structured.
Getting Started
When you create a new protocol, AssaySmarfs automatically adds a mandatory first process to get you started.
- For complex protocols, divide your work into multiple processes, and further into sub-processes and sub-subprocesses as needed.
- For simple protocols, a process can contain only steps.
- For very simple protocols, place all steps under the mandatory process and rename it to match your protocol title or any label you prefer.
This flexibility lets you scale your structure to match your needs.
Adding Elements
When you select any element, a menu of icons appears on the right side.
Click the “+” icon to add a new element. A pop-up menu will show only the elements that are allowed at that level.
For example:
- You won’t see the option to add a sub-subprocess under a process, because sub-subprocesses can only be created under sub-processes.
- Each level shows only valid options, so you can’t accidentally break the hierarchy.
This smart guidance helps you build correct protocols with minimal effort.
About Steps
Although steps are the lowest level in the hierarchy, they are the heart of your protocol. Steps contain the actual instructions and interactive content.
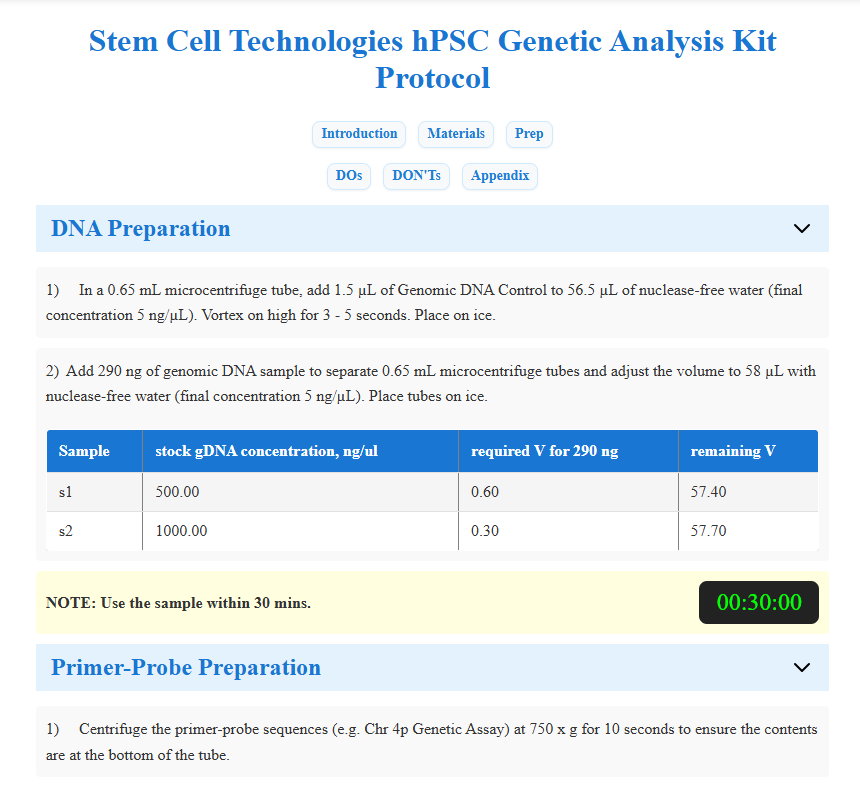
AssaySmarfs currently offers four types of steps:
- Text step
- Text step with timer
- Text step with table
- Text step with image
You can use these as many times as needed. Most are self-explanatory. For detailed guidance on tables, see How to use table step.
Deleting Elements
To delete an element, select it and click the “X” icon in the right-hand menu.
Important: Because of the hierarchical structure, deleting an element will also delete all of its child elements. For example, deleting a process will remove all sub-processes, sub-subprocesses, and steps contained within it.
Editing and Running Protocols
- Auto-save: Everything in AssaySmarfs is saved automatically.
- Edit Mode: Create and modify your protocol.
- View Mode: Run your protocol in a clean, interactive format.
You can switch between Edit and View modes at any time to refine your protocol.